Walkthrough: Coding a GUI calculator in PocketML
This walkthrough shows the core functionality of lib.tea.
1.1 TEA-architecture
The Elm Architecture (TEA) is a GUI architecture that decouples the app logic (tick), visuals/GUI (view) and initial state (init). The essential data types for TEA in PocketML are:
Widget | GUI components like buttons, text or simple shapes/sprites |
Event | When a button is pressed or a frame is rendered, the update function receives an event. |
1.2 Evaluating expressions
Our calculator will have to calculate an expression from a string. PocketML does include an example with an expression evaluator, but in this case we’ll use python interop:
%%%
def PML_eval(s):
	try:
		return str(round(eval(s),4))
	except ZeroDivisionError:
		return "error: division by zero"
%%%;
let eval : String -> String;
1.3 State / Logic
Our calculator will have buttons and a text display that shows the current expression. When the “=” button is pressed, the text display will show the result of the calculation. So our state will just be a String.
type State = String;
let init = "";
To update our state we will use a tick function, that react to the button events. When “C” (clear) is pressed, the state will become the empty string. When “=” is pressed, the result of the expression is written into the state. When another button is pressed and that button happens to be a valid calculator button, the button text will be added to the state.
Note: We also have to include a default case! lib.tea automatically skips rerendering frames when the state didn’t change. The core assumption is that the
viewfunction is pure. Updates can be forced by usingforceUpdate statein the default case oftick.
let tick : Event -> State -> State;
let tick e s = case e
	| BtnPressed "=" ->
		eval (replace "^" "**" s)
	| BtnPressed "C" -> ""
	| BtnPressed x ->
		if isNumeric x || strIn x "()+-*/^."
		then s+x
		else s
	| _ -> s;
1.4 Making the UI layout
Our view includes buttons and the state text. Buttons accept a text and a name, similar to id in html. It is used for UI-diffing in the backend and also the argument of BtnPressed in our tick function.
Note: We could write make all the buttons manually. Instead we will write a 1D list of button labels and then place / create the buttons based on the index in the list.
let mkBtn w n t =
	let pos = @(n-4*int (n/4), 4-int (n/4)) ° w;
	Btn t t pos @(w*.9,w*.9);
Our button layout is:
let btnLayout = [
	"C", "(", ")", "/",
	"7", "8", "9", "*",
	"4", "5", "6", "-",
	"1", "2", "3", "+",
	".", "0", "=", "^"
];
1.5 View
Putting it all together we can generate a view that includes both the buttons and a label with the current expression text:
Note: The Many widget is similar to a html div. It allows us to return multiple widgets from the view. They can also be nested.
let view : State -> Widget;
let view s =
	let w = width/5;
	let btns = Many (imap (mkBtn w) btnLayout);
	let inp = Label s "inp" @(0,w*5) @(w*4,w);
	Many [inp, btns];
1.6 Running the app
lib.tea apps can be launched as follows:
setTick init tick view
1.7 Gallery / Results
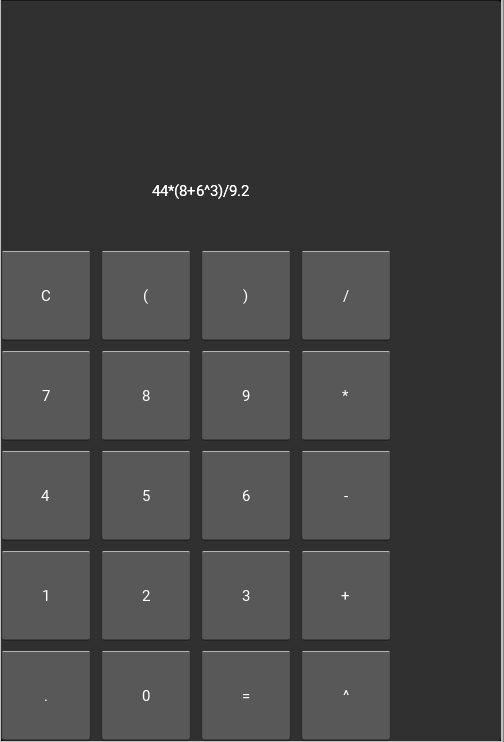
Note: This screenshot is from linux, on android the layout or font might change a little depending on your kivy installation / android version.
Kivy labels don’t have background by default. As an exercise you could add a Rect pos size color behind the label inside view!